Organise a course
A course is a list of units, and each unit holds lessons (a lesson can also be an assessment). This page shows how to build that structure, put it in the right order, publish it, and change or remove the course later. Each task takes a minute or two.
Before you start
- You need to be signed in to the creator studio as a creator or an organisation admin.
- You need a course. If you have not made one yet, start with your first course.
Open a course's curriculum
- In the creator studio, go to My Courses.
-
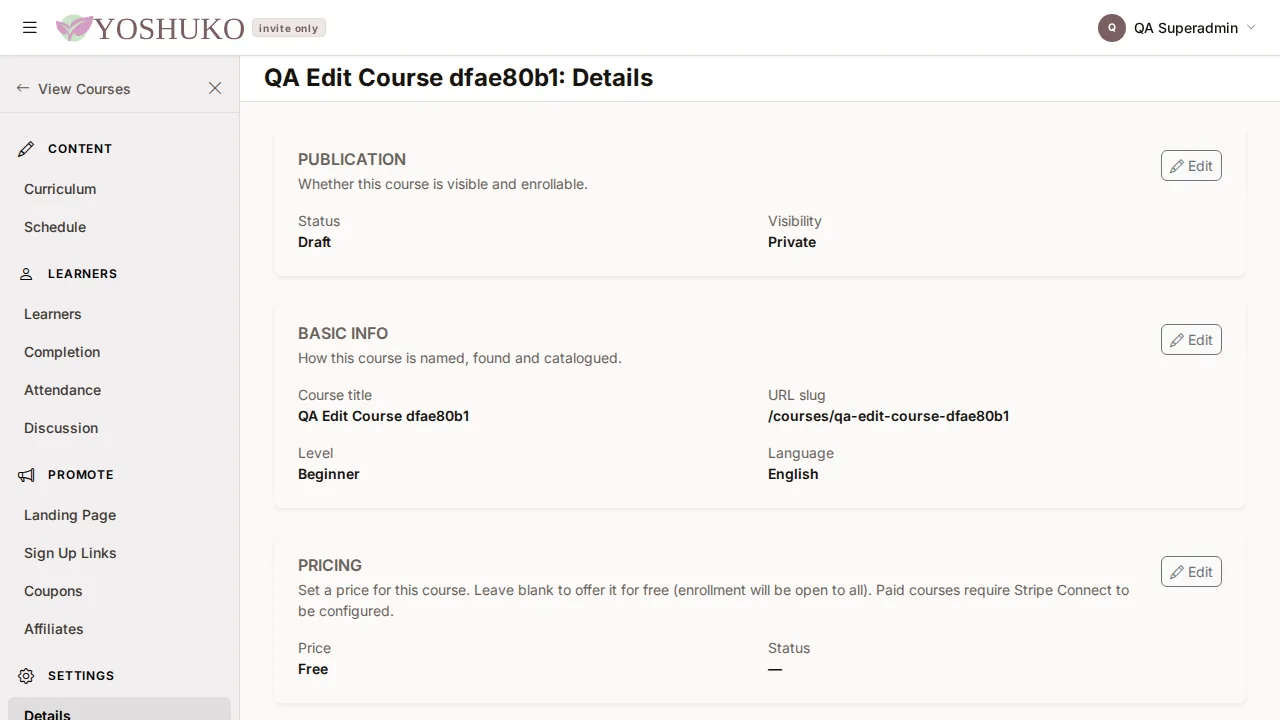
Open the menu on the course's row. It is grouped into sections — Content, Learners, Promote and Settings.
-
Under Content, choose Curriculum. The page lists every unit, with its lessons inside it. Schedule (also under Content) and Details (under Settings) are covered further down.
Add your first unit
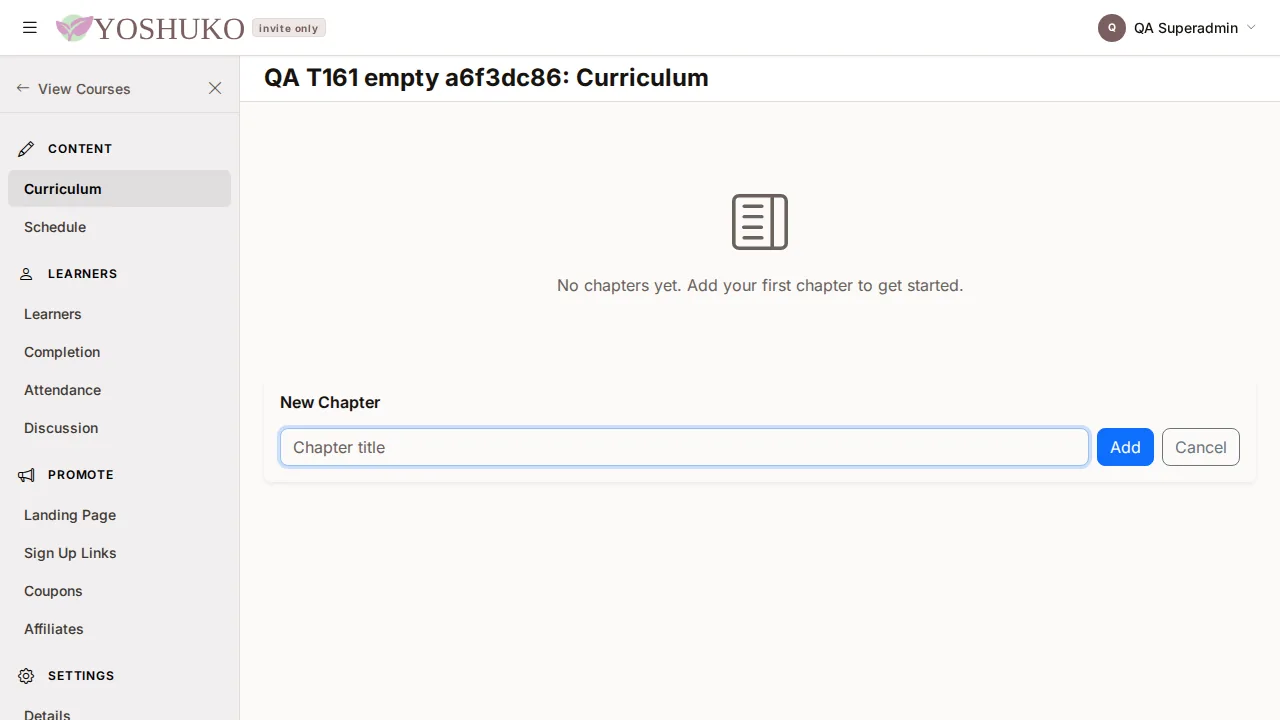
A brand-new course shows "No units yet. Add your first unit to get started."
-
Press Add unit at the top of the page.
-
Type a title and press Add. Cancel closes the form without adding anything.
Add a lesson to a unit
-
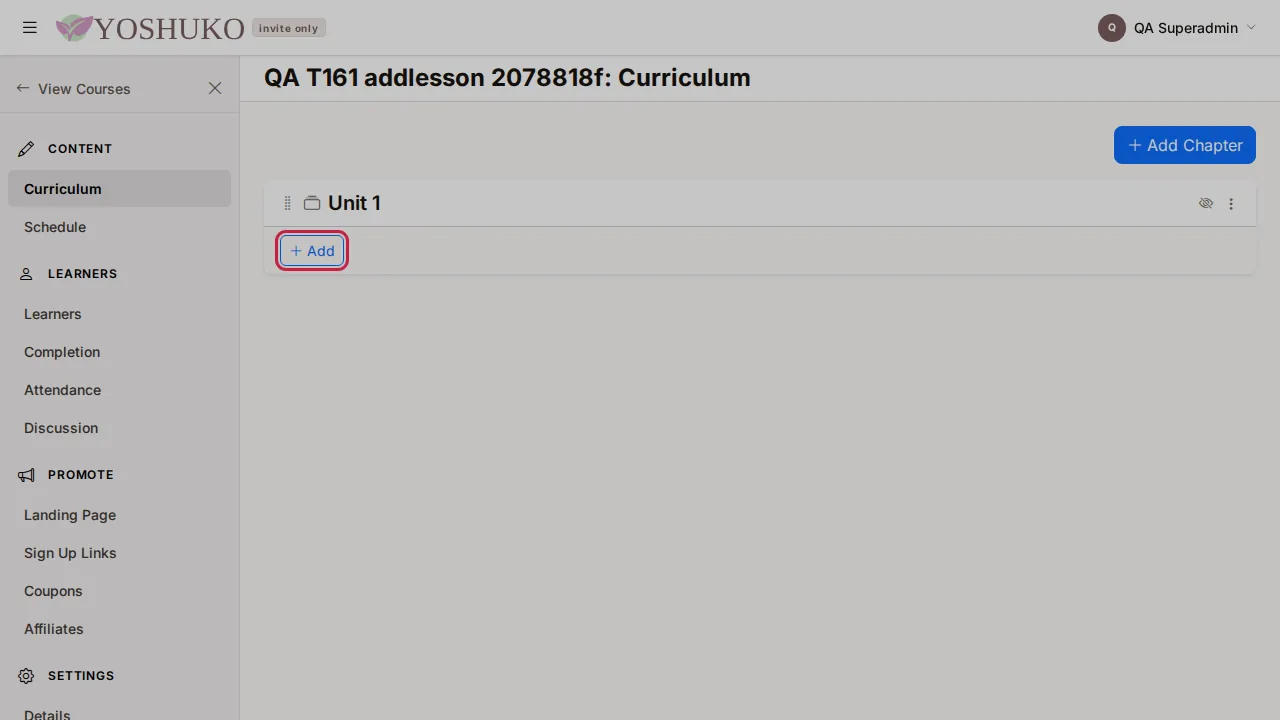
Press Add at the bottom of the unit.
-
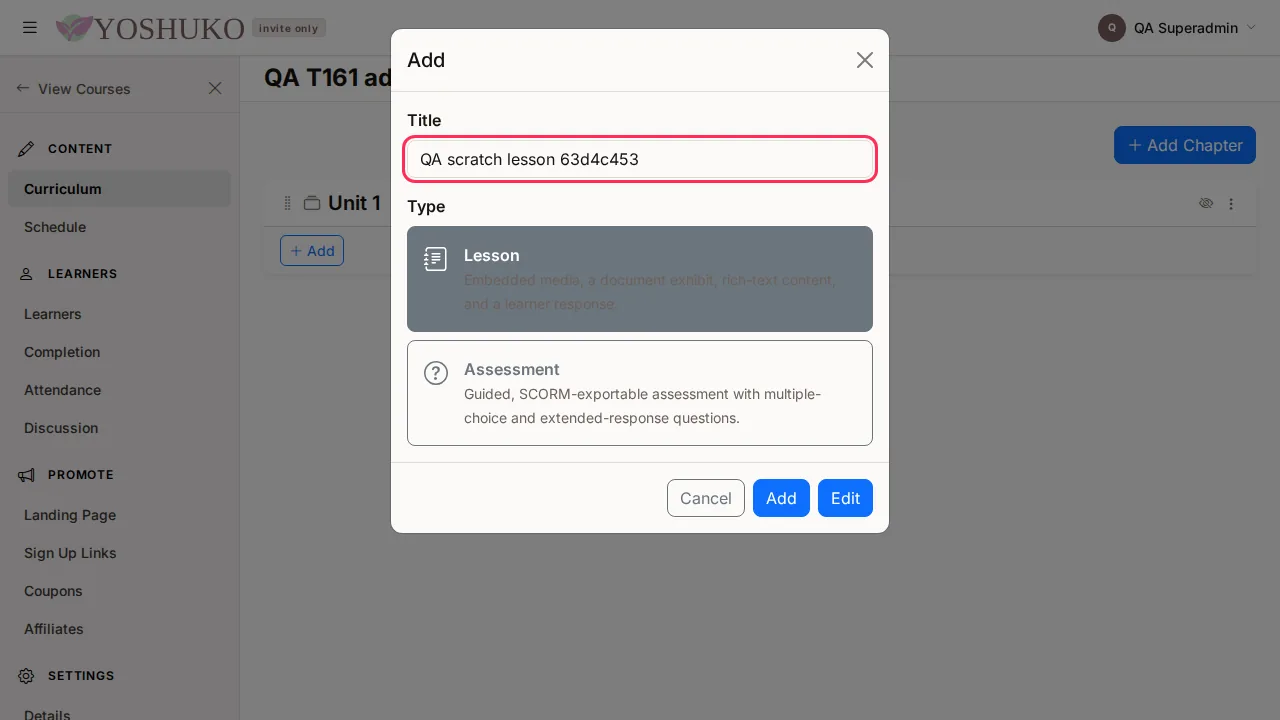
In the dialog, type a Title.
-
Choose the Type:
- Lesson — embedded media, a document exhibit, rich-text content, and a learner response.
- Assessment — a guided assessment with multiple-choice and extended-response questions. See Quizzes and assignments.
- Press Add. The new lesson appears at the end of the unit.
Edit a lesson
Press the lesson's title, or open the lesson's ⋮ menu and choose Edit. Both take you to the same lesson editor.
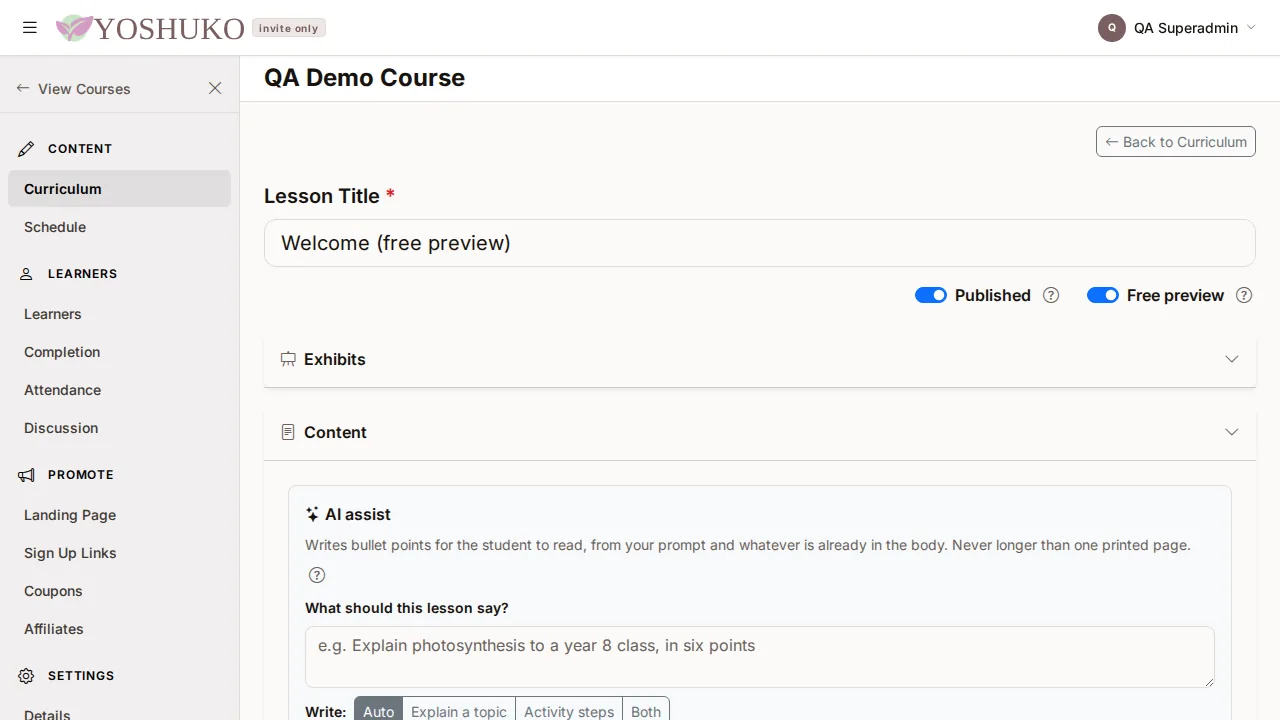
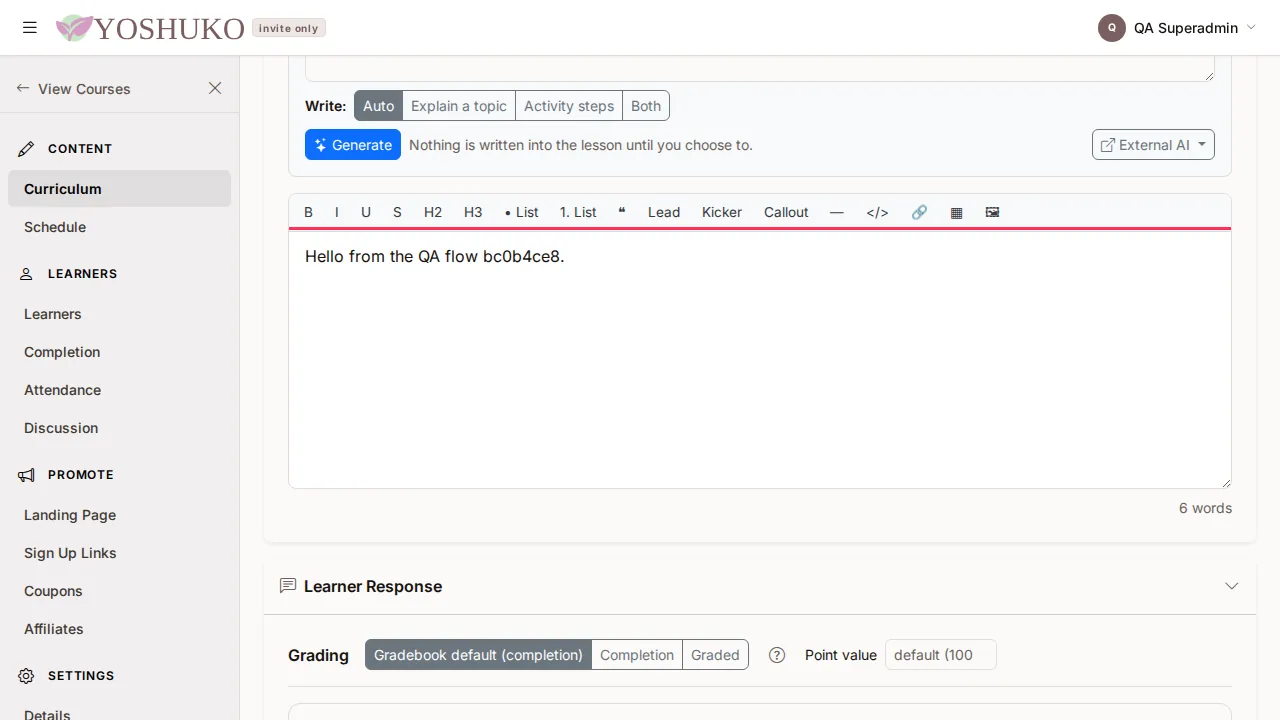
In the editor, change the Lesson Title, write the lesson in the body, and press Save Changes. What you save is still there when you come back. Everything else the editor can do — video, files, availability, free previews — is in Lessons, video and files.
Publish a lesson or a whole unit
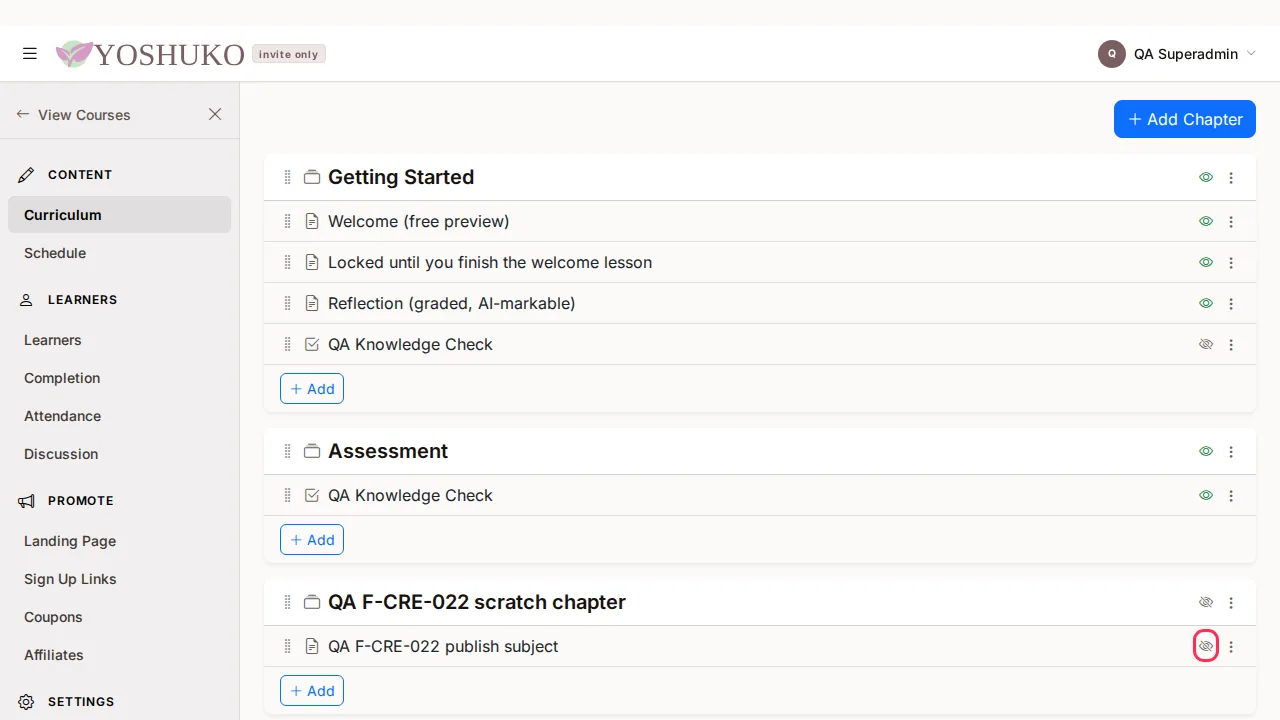
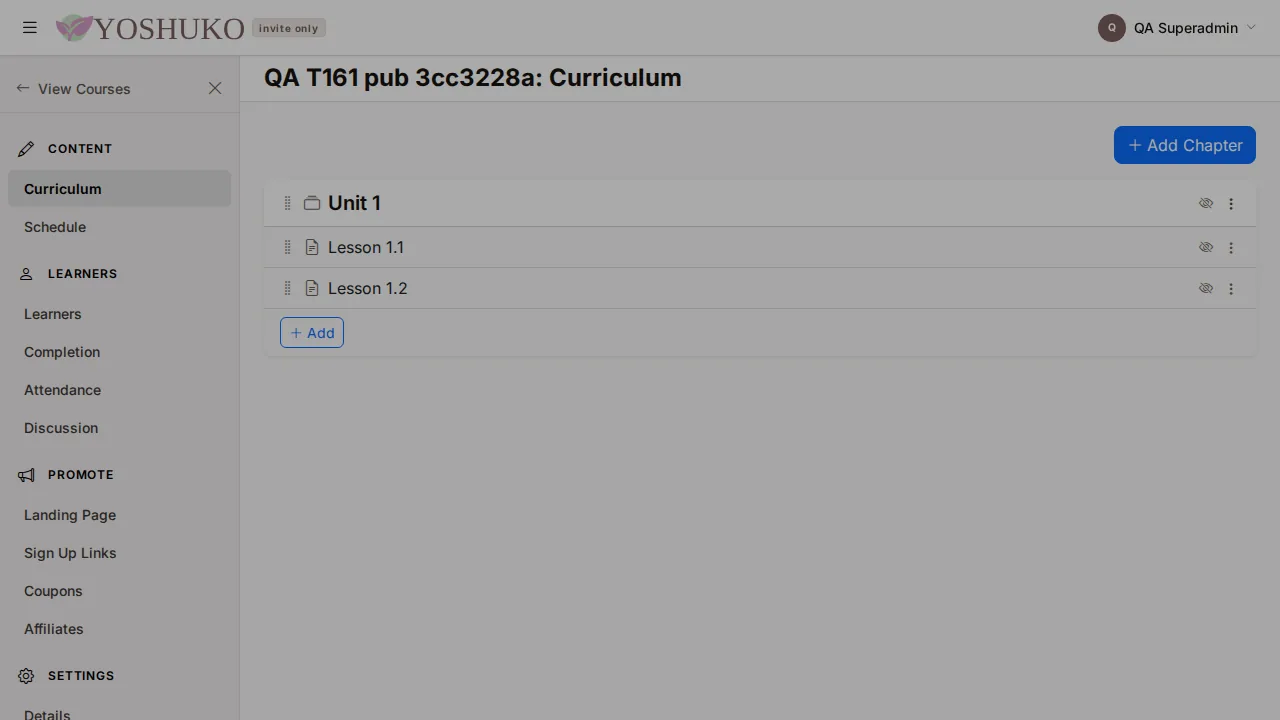
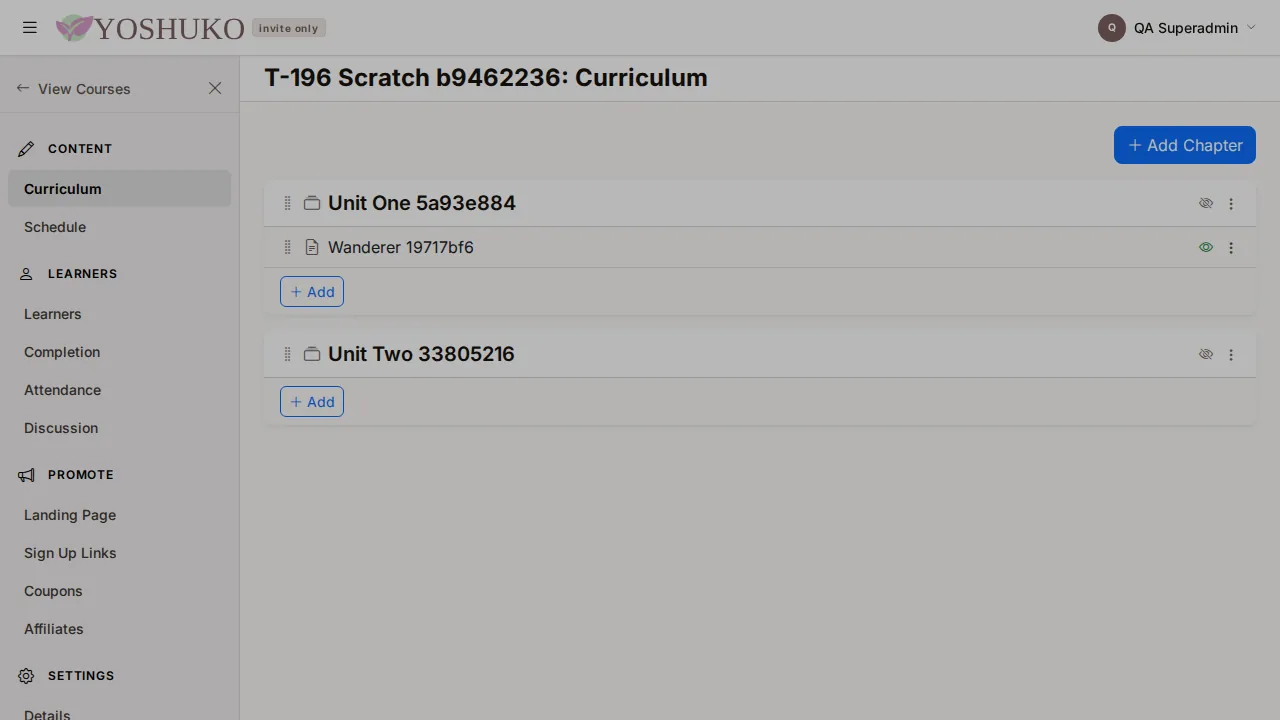
Learners only see what is published. Each row has an eye icon that shows its state — open eye for published, crossed-out eye for draft. Hover over it for a plain description, such as "Lesson is a draft — click to publish".
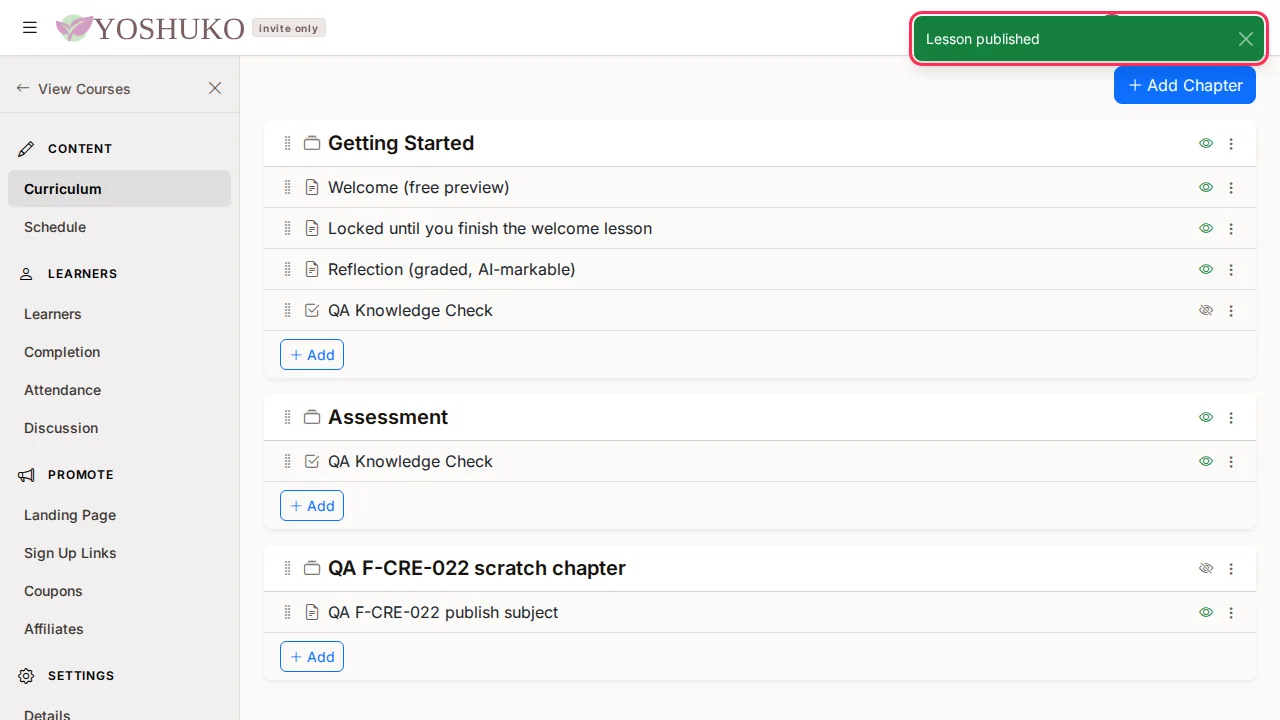
One lesson: press the lesson's eye icon, or open its ⋮ menu and choose Publish (or Unpublish). A short message confirms it, such as "Lesson published", and the row updates straight away.
A whole unit: open the unit's ⋮ menu and choose Publish unit (or press the unit's eye icon). You are asked how much to publish:
| Choice | What happens |
|---|---|
| Publish unit only | The unit becomes visible. Each lesson keeps its current published state. |
| Publish unit and all lessons | The unit and every lesson inside it become visible to learners. |
To hide a published unit, choose Unpublish unit from its menu or press its eye icon, and confirm with Unpublish. Its lessons keep their own state.
Change the order
Drag: hold a row's grip (Drag to reorder) and drop it where you want it. This works for lessons and for whole units.
Without a mouse: open the row's ⋮ menu and choose Move up or Move down. This works the same for units and lessons, and suits a keyboard, a screen reader or a touch screen.
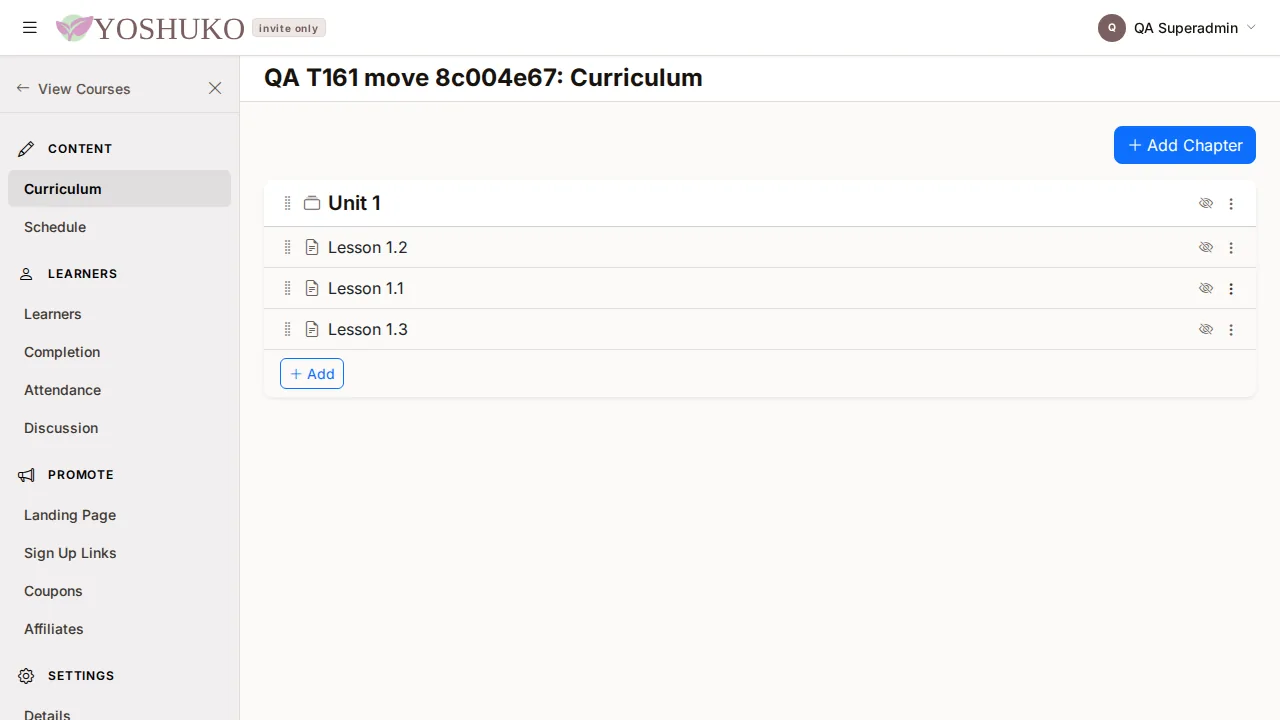
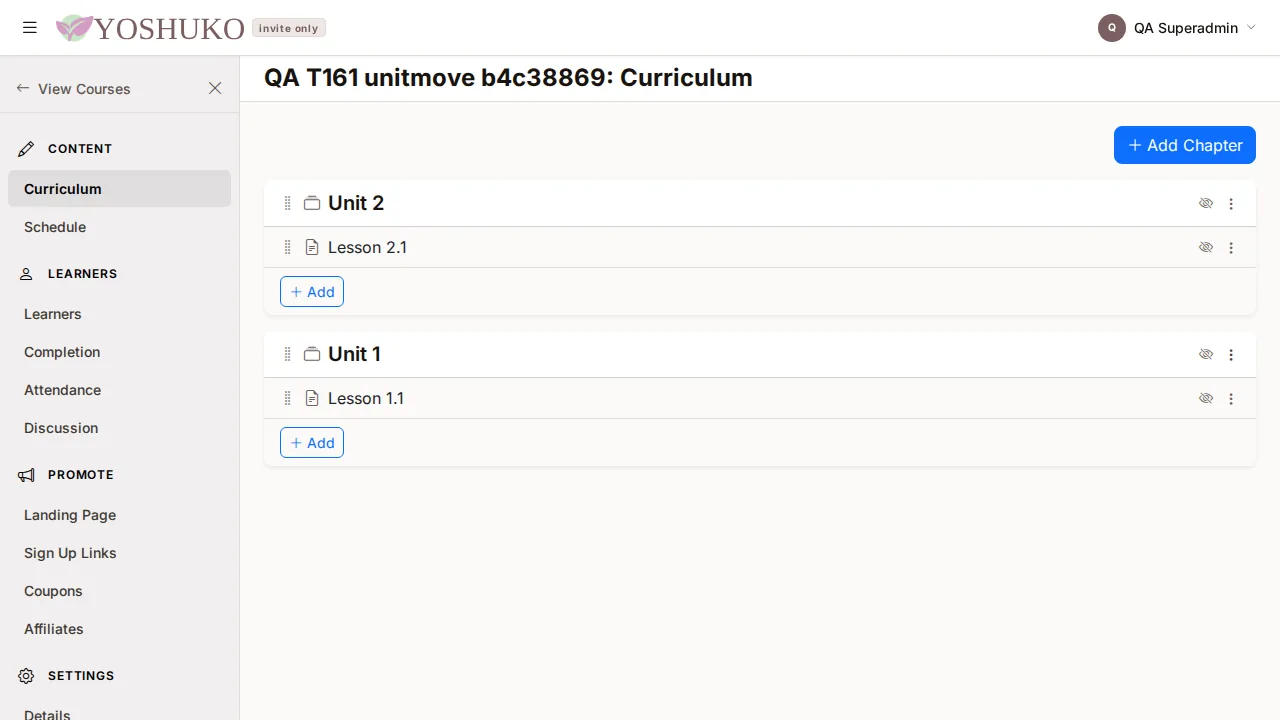
The new order is saved as soon as you move a row.
Move a lesson to another unit
-
Open the lesson's ⋮ menu and choose Move to unit….
-
Pick the unit under Move to unit. The lesson goes to the end of that unit.
- Press Move. A message confirms where it went, such as "Moved to Week 2."
If the course has only one unit, the dialog says "This course has one unit. Add another unit first."
Duplicate a lesson or a unit
-
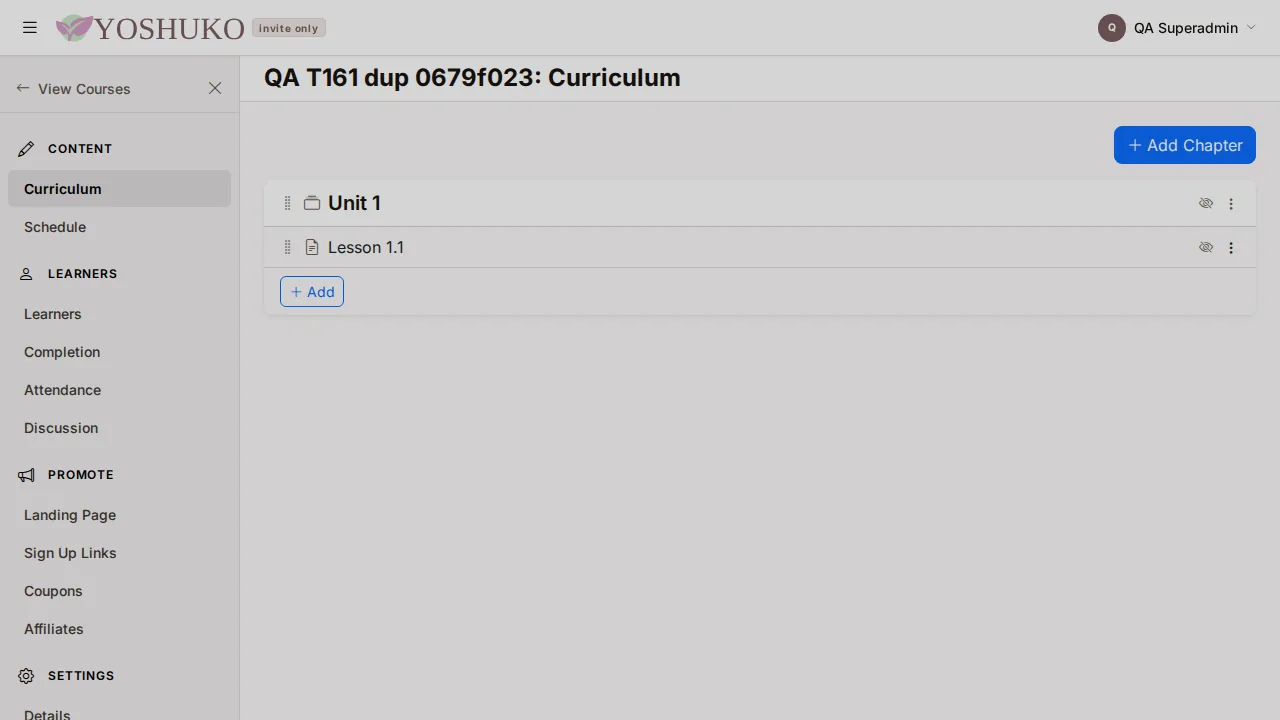
Open the lesson's ⋮ menu and choose Duplicate — or, for a whole unit, open the unit's menu and choose Duplicate unit.
-
Check the Name for the copy and press Duplicate. The original stays where it was.
Change a unit's settings
Open the unit's ⋮ menu and choose Edit unit. You can change the Unit title and set Learner progression:
- Require learners to complete the previous unit first — locks this unit until the one before it is finished. The first unit cannot use this.
- Require lessons to be completed in order — learners must finish each published lesson before the next one unlocks.
Delete a lesson or a unit
-
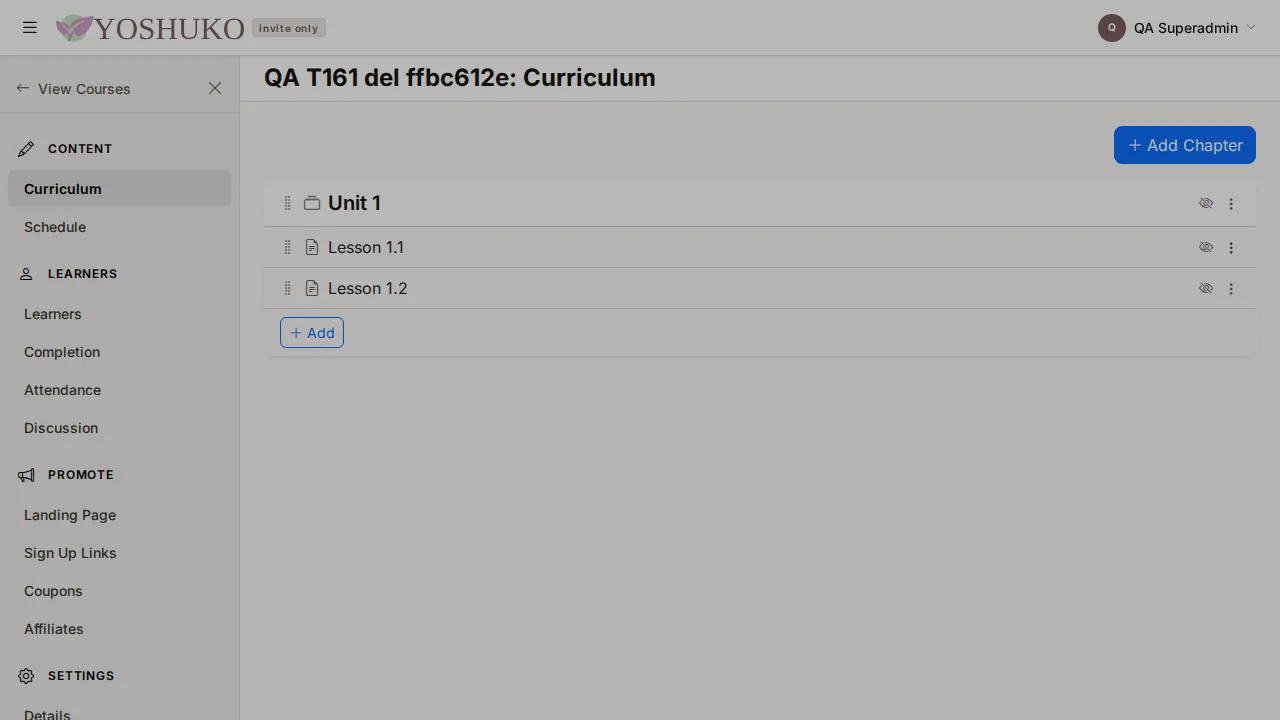
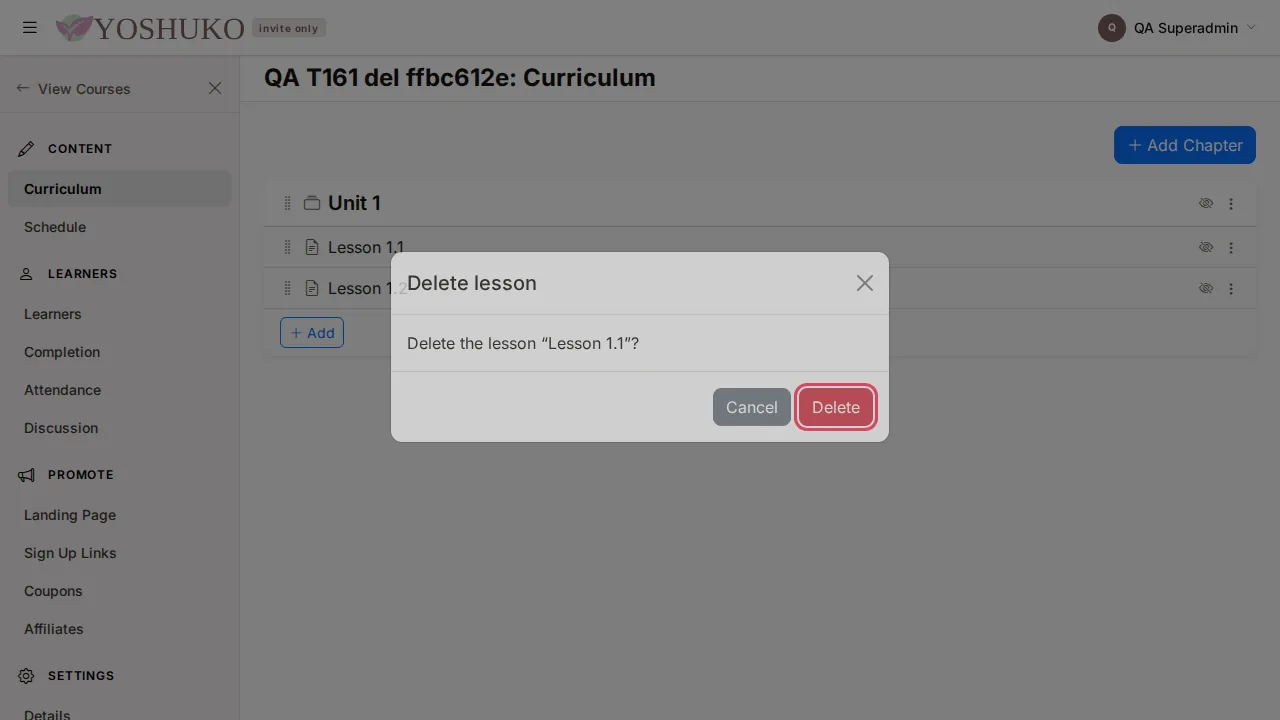
Open the row's ⋮ menu and choose Delete (for a lesson) or Delete unit.
-
You are asked to confirm, with the name shown. Deleting a unit deletes all its lessons too. Press Delete to go ahead, or cancel.
Change a course's details after publishing
You can rename a course and change its settings at any time — learners who have already joined keep their place.
- Open the course's row menu on My Courses and choose Details (under Settings).
-
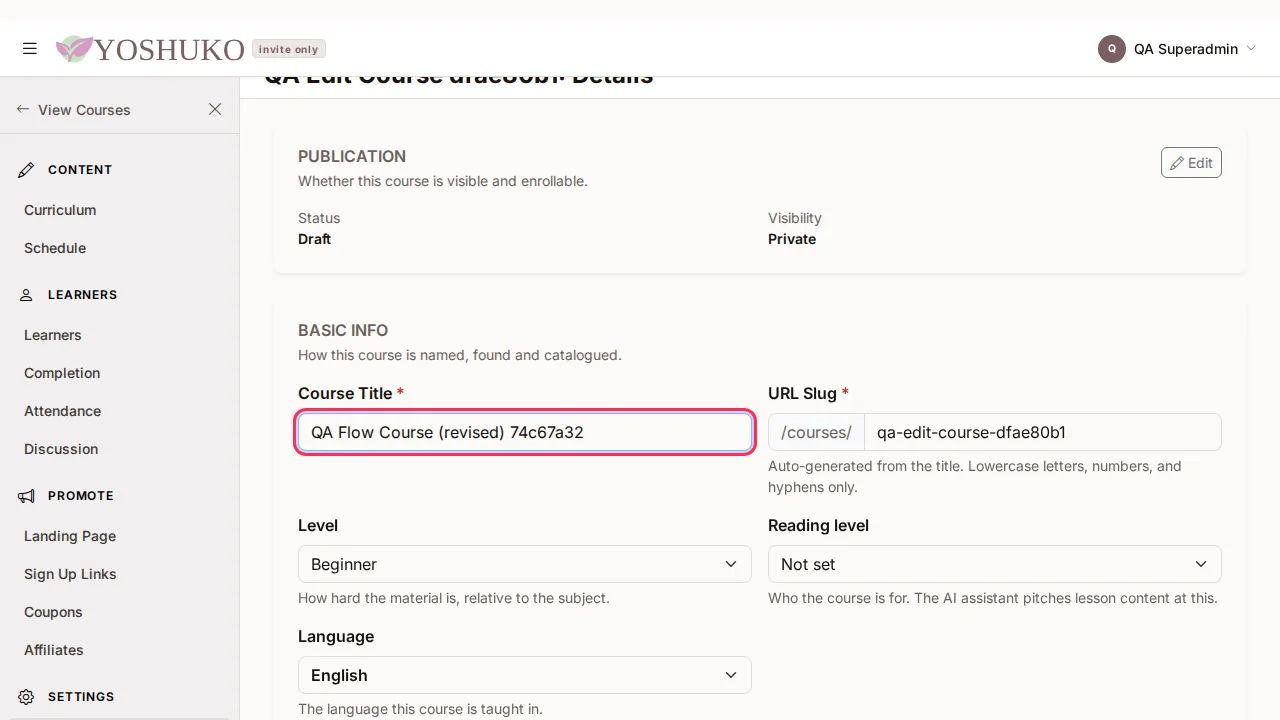
In Basic Info, press Edit, change the Course Title or anything else, and press Save Changes.
-
In Publication, press Edit to change:
- Status — Draft (not visible to students), Published (live and enrollable) or Archived (hidden from new students).
- Visibility — Public (listed in the marketplace), Unlisted (reachable only by a direct link) or Private (invite-only).
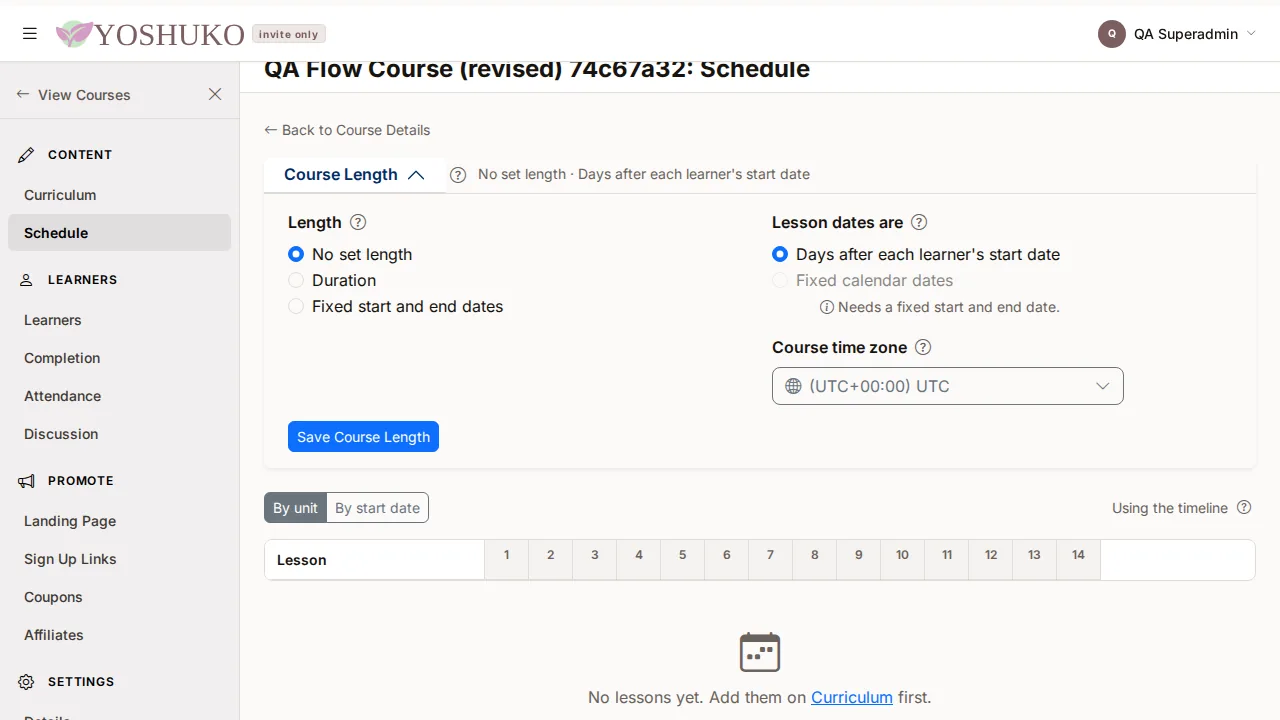
Then press Save Publication Settings. 4. To change how long the course runs, press Schedule on the Course Length card. There you choose No set length, a Duration in days, or Fixed start and end dates, and the Course time zone that lesson opening and closing times use. Press Save Course Length.
Archive or delete a course
Both are in the Danger Zone at the bottom of the course's Details page.
- Archive this course hides the course from new students but keeps every existing enrolment. You are asked to confirm. Restore from archive brings it back as a draft.
- Delete this course removes the course with its units, lessons and files for good. You are asked to confirm, and it cannot be undone. When it is done you return to My Courses.
A course with enrolled learners cannot be deleted — the page tells you why, next to the button. Archive it instead.
Build a course in the app
You can also build a simple course from the Yoshuko app on the web. Choose Authoring in the app's menu.
- Press New course, type a Title — the Web address fills itself in from it — and press Create course. The course opens on Units and lessons.
- Press Add unit, name it, and press Add unit again.
- Press Add lesson under the unit, name it, and press Add lesson again.
- Open the lesson. Write the Lesson text, press Upload a video to add a video (progress shows while it uploads), switch on Published, and press Save lesson.
Each unit and lesson has a menu with Rename, Move up, Move down and Delete. Pricing, the schedule and the rich-text editor are only in the creator studio — the app links you there.
Automate this
Courses, units and lessons can also be created and arranged with an API key. See Build a course with the API.
If something goes wrong
| You see | What it means | What to do |
|---|---|---|
| "Could not save the new order. The list has been put back to the saved order." | A reorder did not reach the server. The list now shows the order that is really saved. | Try the move again. If it keeps failing, reload the page. |
| "That change did not save." | A publish, unpublish or other change was refused or did not arrive. The row still shows the real state. | Try again, or reload the page. |
| "Drag-to-reorder is unavailable…" | Dragging could not load on this page. | Use Move up / Move down in a row's ⋮ menu instead. |
| Status and Visibility on the Details page show a dash (—) | The course's details could not be loaded. The page shows nothing rather than a guess, so you cannot save a wrong value by accident. | Reload the page. Check you are still signed in. |
| A message beside Delete this course says learners are enrolled | Courses with enrolled learners cannot be deleted. | Choose Archive this course instead. |